To prevent most common problems with non-electric cold brew makers, focus on proper setup and equipment care. Use a durable, snug-fitting filter—pre-wet it to avoid shifting or sediment—and distribute grounds evenly in a coarse grind. Make certain your chamber is clean and correctly assembled to prevent leaks and clogging. Maintaining consistent steps and checking your setup will lead to smooth, flavorful brews every time; discover more tips to perfect your cold brew process.
Key Takeaways
- Ensure a secure, properly fitted filter to prevent leaks, sediment, and uneven extraction.
- Pre-wet filters with warm water to eliminate residue and improve adherence during steeping.
- Use a coarse grind and distribute grounds evenly to avoid clogging and over-extraction.
- Maintain a clean brewing chamber and equipment regularly to prevent blockages and flavor dulling.
- Keep the setup in a cool environment, monitor steep time, and verify proper filter placement for consistent results.
Why Proper Setup Ensures Perfect Cold Brew Every Time
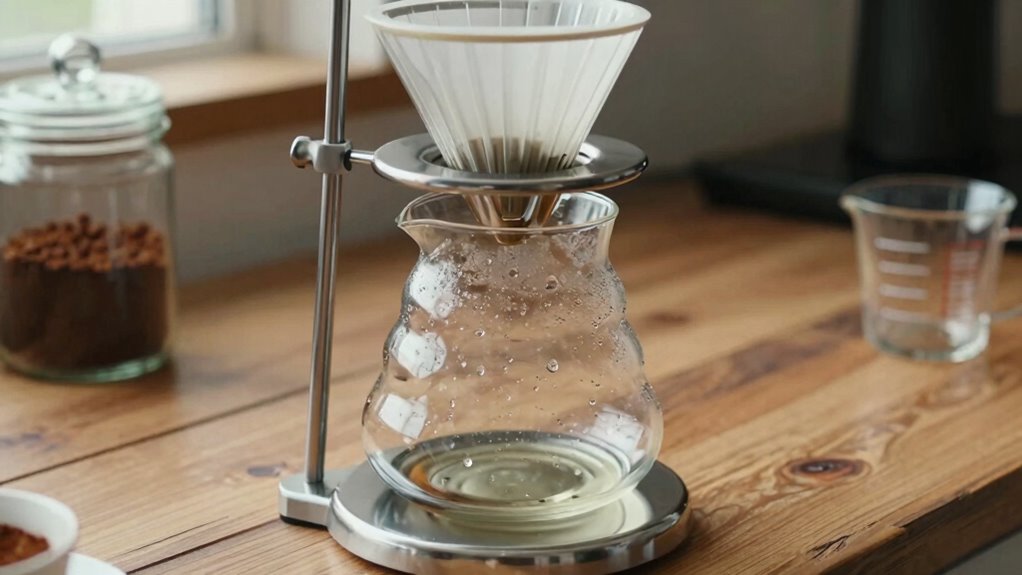
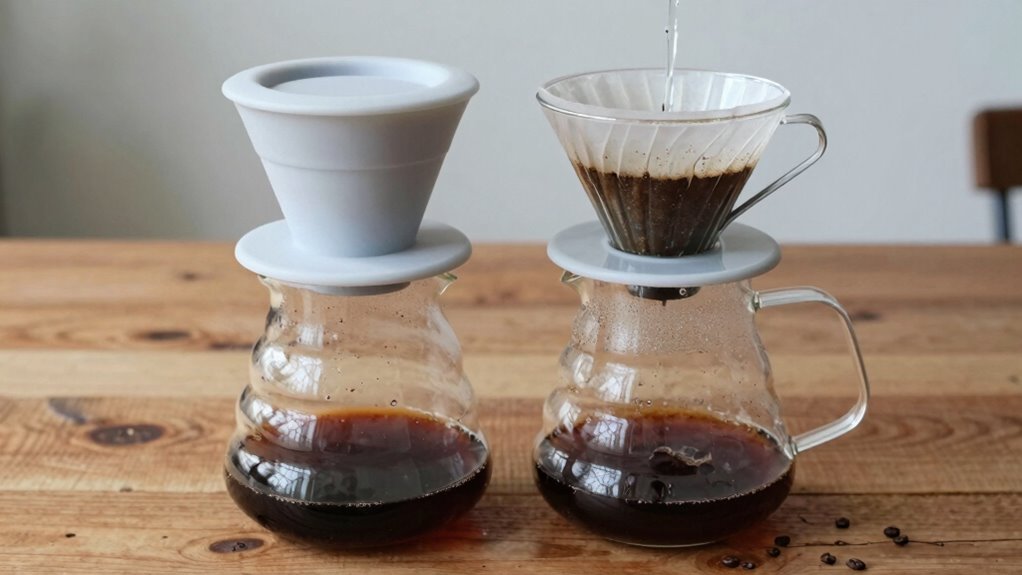
A proper setup is essential for consistently making great cold brew with a non-electric coffee maker. The first step is selecting the right filter material, which affects how well the brew extracts and how clean the final product tastes. Confirm the filter is securely placed within the brew chamber to prevent leaks or sediments slipping through. A snug fit keeps out unwanted particles and maintains consistent water flow during steeping. Also, check that the brew chamber is clean and free of obstructions before adding coffee grounds and water. Proper setup minimizes the risk of over-extraction or sediment in your cold brew, ensuring a smooth, flavorful result every time. Paying attention to these details makes your cold brew process more reliable and enjoyable. Proper equipment maintenance can also enhance your brewing setup, making it easier to monitor and perfect each batch for optimal results. Additionally, understanding cold brew extraction principles helps in refining your process for better flavor and consistency, which is supported by consistent brewing techniques.
Step-by-Step: Preparing Your Filter and Brew Chamber
Start by selecting a filter that fits your brew chamber snugly to prevent grounds from slipping through. Next, position the filter firmly in place, ensuring it’s centered and secure for even extraction. Before adding coffee, pre-wet the filter to reduce any paper taste and help it settle properly. Incorporate natural filtration systems to enhance water clarity and support eco-friendly practices. Additionally, utilizing consistent brewing techniques can improve the overall flavor consistency of your cold brew. Regularly checking and maintaining your setup can further prevent common issues and enhance the quality of your brew, especially when you understand the importance of proper setup procedures for reliable results.
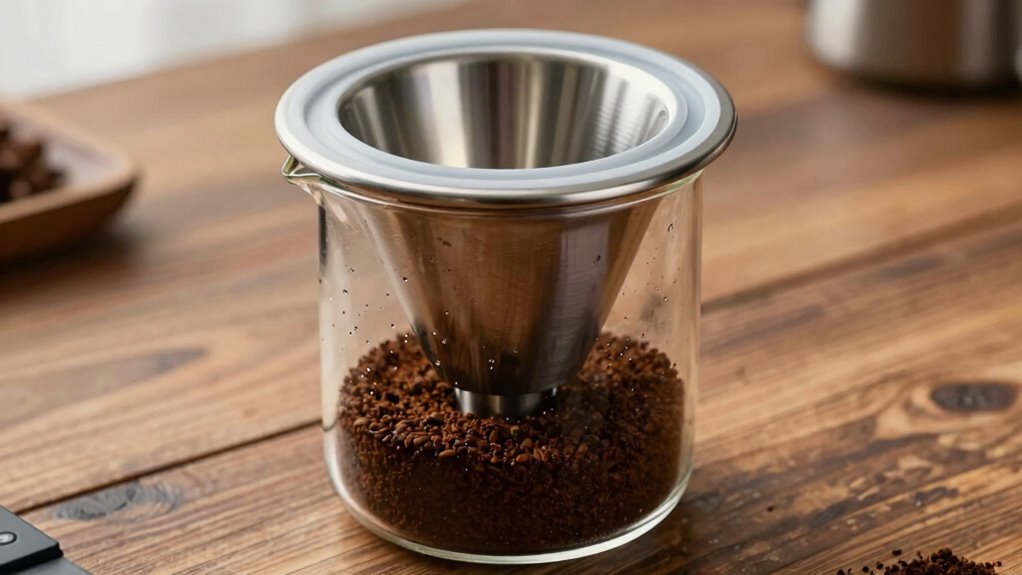
Choosing the Right Filter
Choosing the right filter is essential for guaranteeing your cold brew tastes smooth and free of grit. Start by selecting a filter material that’s durable and fine enough to trap coffee grounds but still allows water to flow freely. filter material options include stainless steel mesh or reusable cloth filters, which reduce waste and improve flavor clarity. Pay attention to filter size; it should fit snugly within your brew chamber without gaps, preventing grounds from slipping through. A properly sized filter ensures even extraction and prevents messes. Avoid overly coarse filters that let grounds slip into your brew, or too fine filters that slow down the process. Selecting the correct filter material and size guarantees a clean, flavorful cold brew every time. Additionally, consider filter maintenance to ensure consistent performance and prevent buildup that could affect taste. Staying aware of market dynamics of coffee brewing equipment can also help you choose the best setup by staying informed about the latest innovations and trends.
Proper Filter Placement
To guarantee your cold brew filters properly, begin by placing the chosen filter securely in the brew chamber. Correct filter placement ensures even extraction and prevents leaks. Take your time to position the filter flat against the chamber’s walls or base, avoiding tilts that could cause overflow. When considering filter selection, opt for a size that fits snugly without gaps. Keep these tips in mind:
- Choose a filter compatible with your brew chamber size
- Ensure the filter lies flat, covering all openings
- Avoid overstuffing the filter with coffee grounds
- Check for secure placement before pouring water
- Use a clip or holder if necessary for extra stability
- Remember that filter compatibility plays a critical role in preventing common problems like clogging or uneven brew. Additionally, verifying that the filter is properly seated can significantly reduce the likelihood of leaks or overflow. Proper filter placement is essential for consistent brewing results and overall success of your cold brew process. Paying attention to proper seating techniques can further enhance your brewing experience and minimize errors, especially since correct setup is fundamental to achieving the best flavor extraction.
Pre-Wetting the Filter
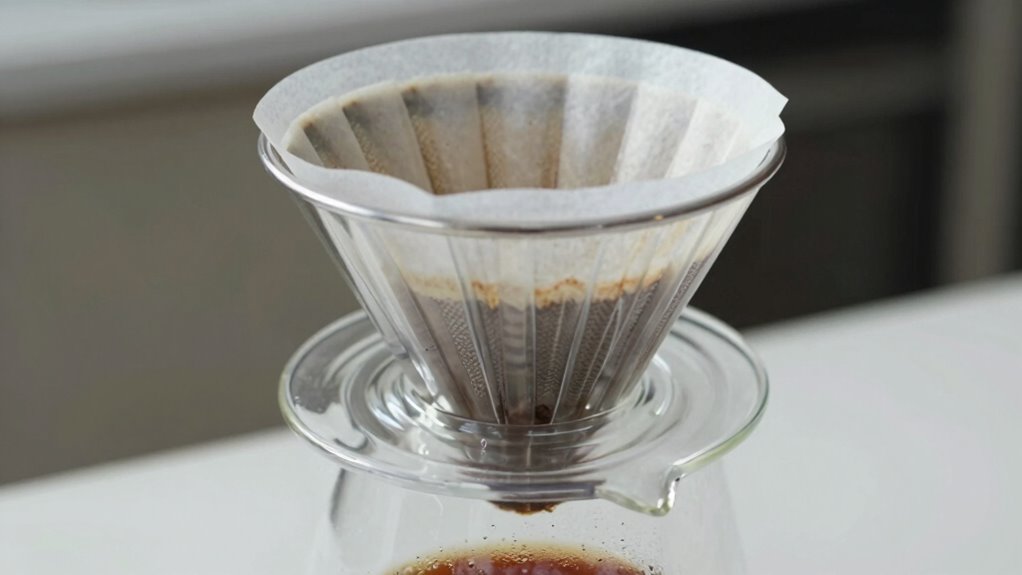
Pre-wetting the filter is a simple step that helps guarantee a smooth brewing process and better-tasting coffee. When you pre-wet the filter material, it helps remove any residual paper or manufacturing residues that could affect flavor. Dampen the filter inside the brew chamber before adding coffee grounds. This prevents the filter from shifting or collapsing during brewing, ensuring an even extraction. Additionally, pre-wetting helps the filter adhere better to the sides of the brew chamber, reducing the chance of coffee grounds slipping through. Use warm water to soak the filter for a few seconds, then gently tap out any excess. This small step makes a significant difference in achieving a clean, smooth cold brew and simplifies cleanup later. Incorporating proper technique into your routine can also enhance your overall coffee experience and prevent common problems, especially when aligning your setup with home brewing best practices.
The Key Setup Step to Prevent Clogging and Over-Extraction

Ensuring a smooth brewing process starts with the key step of proper coffee bed preparation. To prevent clogging and over-extraction, focus on correct filter placement and controlling the brewing temperature. Use a clean, well-fitted filter to avoid gaps that cause uneven flow. Pack the coffee grounds gently, avoiding compression that blocks water flow. Ensure the coffee bed is evenly distributed for consistent extraction. Maintain a steady, cool brewing temperature to slow extraction and improve flavor. Rinsing the filter before use helps keep it clear of debris that could cause clogging. Additionally, understanding the importance of support breakfast options can enhance your overall coffee experience. Proper filter fit and technique are essential for preparing ingredients that go well with your coffee, making your morning routine more efficient and enjoyable.
Tips for Consistent, Smooth, Rich Cold Brew
To get consistent, smooth, rich cold brew, focus on optimizing your brewing time to prevent over- or under-extraction. Use a consistent grind size to ensure even extraction and avoid bitterness or weak flavors. Small adjustments in these areas can make a big difference in the quality of your cold brew.
Brewing Time Optimization
Optimizing brewing time is key to achieving a consistent, smooth, and rich cold brew. Proper steep time guarantees your coffee doesn’t become bitter or weak, while temperature control maintains the ideal environment for extraction. To get it right, consider these tips:
- Stick to recommended steep times based on your recipe or equipment
- Use a timer to prevent over or under-extraction
- Keep your setup in a cool, stable environment to maintain consistent temperature control
- Adjust steep time if your grind size or coffee type changes
- Taste-test periodically to find your perfect balance
Grind Consistency Techniques
Achieving a smooth, rich cold brew depends heavily on consistent grind size, as uneven grounds can lead to over- or under-extraction. To guarantee grind uniformity, start with a burr grinder rather than a blade grinder, which produces more consistent particles. Adjust the grind size to a coarse setting, similar to raw sugar, to prevent over-extraction and bitterness. Sift the grounds through a fine mesh or use a grinder with built-in size control to eliminate uneven particles. Stir the grounds gently after grinding to distribute them evenly. Store your grounds in an airtight container to maintain consistency between brews. Regularly cleaning your grinder prevents buildup that could affect grind size. Consistent grind size is key to extracting balanced, flavorful cold brew.
How to Recognize a Correct Cold Brew Setup
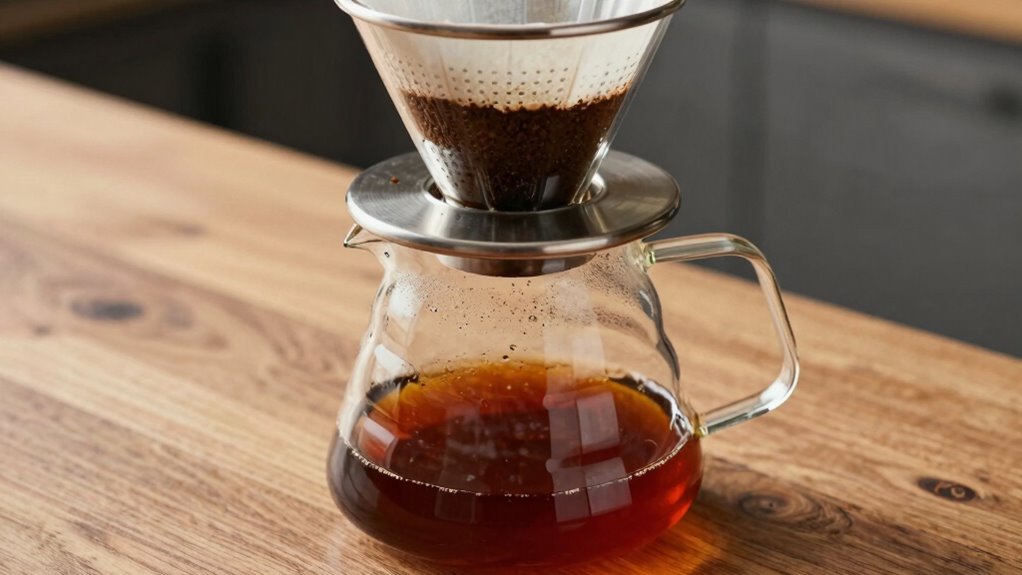
A correct cold brew setup guarantees you get smooth, flavorful coffee without any mess or hassle. To recognize one, focus on a few key points. First, choose the right filter selection—preferably a fine mesh or dedicated coffee filter—that prevents grounds from slipping through. Second, verify the water temperature is stable; cold water or room temperature water works best for extraction. Third, confirm your coffee grounds are evenly distributed in the setup, avoiding clumps. Fourth, check that your setup is sealed properly to prevent leaks. Lastly, make sure your brewing vessel is clean and free of residue, which can affect flavor. When all these elements align, you’ll enjoy a clean, consistent cold brew every time.
Troubleshooting Common and Rare Cold Brew Problems
Even with a proper cold brew setup, issues can still crop up that affect the flavor or process. If your brew tastes off or is too weak, consider storage tips—refrigerate your coffee in a sealed container to prevent absorption of fridge odors. Sometimes, the flavor needs adjustment; adding a touch of salt or a splash of milk can enhance taste. If your brew is too bitter, try reducing steeping time or using coarser grounds. For rare problems like sediment in your coffee, confirm you’re filtering thoroughly or using a finer mesh. Always check your storage conditions to keep your brew fresh longer. Troubleshooting involves small tweaks—adjust flavor with extras and optimize storage to maintain quality and prevent common issues.
Final Tips to Optimize Your Cold Brew Maker for Best Results
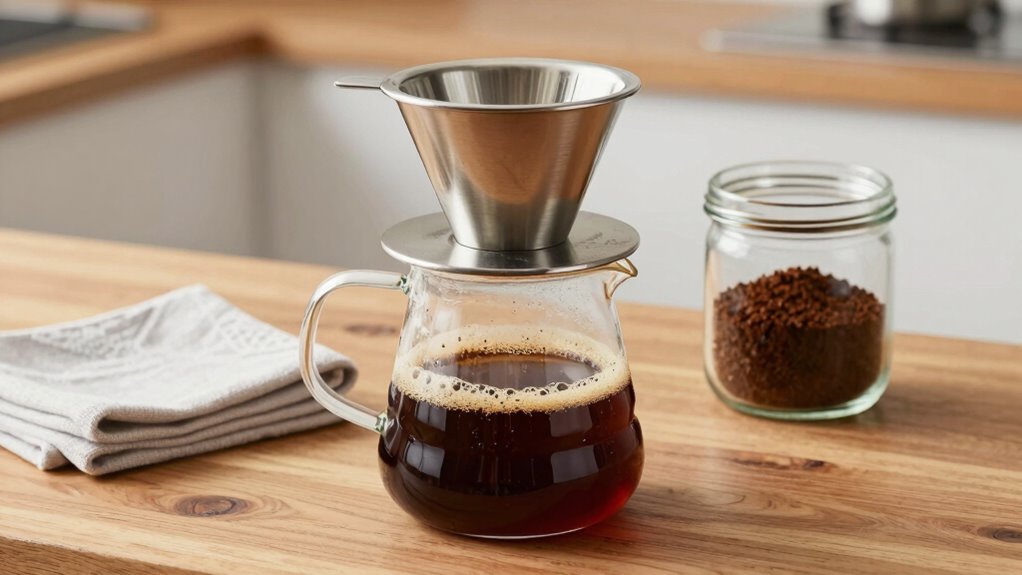
To get the most out of your cold brew maker, focus on fine-tuning your process and maintaining your equipment. Consistent equipment maintenance prevents blockages and ensures smooth operation, while adjusting the steeping time can enhance flavor. For better flavor enhancement, experiment with different coffee bean roasts and grind sizes. Keep your setup clean; residual oils can dull the taste. Use filtered water to improve clarity and flavor. Store your brew in a sealed container to maintain freshness. Regularly check for leaks or wear and tear, and replace parts as needed. These simple steps help you maximize flavor and minimize problems, ensuring every batch tastes its best. Proper setup and upkeep turn your cold brew experience into a seamless, flavorful ritual.
Frequently Asked Questions
Can I Use Different Coffee Grind Sizes With This Setup?
Yes, you can use different coffee grind sizes with this setup. Just keep in mind that grind consistency impacts coffee extraction, so a uniform grind helps guarantee even flavor. Coarser grinds are ideal for slow extraction, while finer ones may lead to over-extraction and bitterness. Experiment with different sizes to find your perfect balance, but maintaining consistent grind size is key to achieving the best cold brew.
How Long Should I Let the Cold Brew Steep?
You should let your cold brew steep for about 12 to 24 hours, depending on your preferred strength. A longer steeping duration allows for better flavor extraction, resulting in a richer, more robust taste. If you want a smoother, milder brew, stick closer to 12 hours. Keep in mind that steeping too long might lead to over-extraction, making the coffee bitter. Experiment within this range to find your perfect balance.
Is It Necessary to Pre-Wet the Filter Before Brewing?
Did you know pre-wetting your filter can make a big difference? It guarantees proper filter preparation, which prevents coffee grounds from sticking and promotes better coffee saturation. You don’t need much—just rinse the filter with cold water before adding your coffee. This simple step helps avoid clogging and ensures your cold brew flows smoothly, giving you a richer, cleaner flavor without any hassle or mess.
What’s the Best Way to Clean and Maintain the Setup?
To keep your setup in top shape, regularly clean your filter to prevent buildup and guarantee smooth brewing. Use warm water and a gentle brush for filter cleaning, and rinse thoroughly. For setup maintenance, disassemble parts carefully, checking for wear or damage, and store everything in a dry place. Doing this weekly keeps your cold brew tasting fresh and prevents common issues, so your setup stays reliable and efficient.
Can I Adjust Brewing Strength Without Changing the Coffee Amount?
Want to tweak your brew strength without changing the coffee amount? You can! Adjust the coffee ratio during setup—use a finer or coarser grind, or change the steeping time. Finer grounds or longer steeping intensify the flavor, while coarser or shorter times mellow it out. This secret allows you to customize your brew strength easily, ensuring each batch hits your perfect taste without fussing over the coffee ratio.
Conclusion
Ironically, the secret to perfect cold brew isn’t some fancy gadget or secret ingredient—just a proper setup. By following these simple steps, you’ll avoid most headaches and enjoy smooth, rich coffee every time. So, next time your brew turns bitter or clogs up, remember it’s probably your setup, not your coffee. After all, isn’t the real trick just doing it right from the start? Cheers to effortless perfection!