TL;DR

Get kitchen staples and gadgets delivered free with Prime
- Fast, free delivery on millions of items
- Prime Video, Amazon Music and more included
- Member-only deals all year
Halloween-themed cookie cutters are shaped tools used to cut rolled dough into seasonal designs such as pumpkins, ghosts, bats, and cats. Choose sturdy, food-safe cutters in sizes that suit your recipe, chill dough before cutting, press straight down without twisting, and decorate only after cookies cool completely.
A ghost cookie can go from charming to lopsided with one warm, sticky sheet of dough. The cutter gets the credit, but dough temperature, cutter shape, and a steady press often decide whether your batch looks like a haunted house or a cheerful blob.
Halloween-themed cookie cutters are shaped tools used to cut rolled cookie dough into seasonal designs. In this guide, you’ll learn how to choose shapes and materials, keep dough from sticking, decorate cookies that look polished, and clean and store your cutters for next October. You’ll also find practical food-safety reminders for baking with kids or bringing treats to a party.
Choose a cutter material and size that fit your recipe, grip, and decorating time.
Chill soft dough and press cutters straight down without twisting to protect crisp outlines.
Bake similarly sized cutouts together and follow your recipe’s temperature and timing.
Cool cookies fully before decorating, and label common allergens when sharing them.
Wash cutters as directed, dry them completely, and keep food tools separate from craft tools.
What Halloween cookie cutters can help you make
Halloween cookie cutters are shaped tools used to cut rolled dough into seasonal cookies, from familiar pumpkins and ghosts to bats, cats, skulls, witches’ hats, tombstones, and haunted houses. They create the outline; icing, sprinkles, and other decorations turn that outline into a character or scene. That division of labor makes a cutter useful even if you’re not a confident decorator.
For example, a plain pumpkin cutter gives you a clean orange shape in seconds. Add a green icing stem and three dark chocolate chips, and guests recognize it across the snack table. A ghost can stay simple too: white icing, two small chocolate eyes, and a slightly wavy lower edge.
These cutters work with sugar-cookie dough and gingerbread, and many food-safe designs can also shape fondant, sandwiches, fruit, or pancakes. That flexibility is handy when your Halloween party needs more than dessert: use a bat cutter for a sandwich platter and a matching cookie shape for a sweet tray. Keep cutters used with craft materials, such as clay, completely separate from food tools.
Sets often pair classic outlines with stamps or embossers that press surface patterns into dough or fondant. Those details can add a ribbed pumpkin or a web to a bat, though narrow features may take more care to clean. If you’re browsing themed cookie cutters, choose designs you can recognize and decorate without needing a steady hand and an hour of tiny icing work.
As an affiliate, we earn on qualifying purchases.
How to choose a cutter that fits your baking plans
The best Halloween cookie cutter is the one that suits your dough, baking frequency, and decorating time. Stainless steel is sturdy and generally easy to clean, while plastic can feel comfortable in your hand and may include a built-in stamp. Copper cutters offer an attractive, crafted look, but may need more careful care. No one material wins for every baker.
Imagine you’re making two dozen cookies with children before a school party. A broad pumpkin or ghost cutter with an easy grip is a better fit than a thin, elaborate haunted-house outline. If you bake every October, durable metal shapes may be worth the purchase; if you want bright colors and a simple afternoon activity, plastic may work well.
| Material or design | What it does well | What to check |
|---|---|---|
| Stainless steel | Sturdy cutting and easy cleanup | Edges and any seams |
| Plastic | Comfortable grip; sometimes includes stamps | Thin details and durability |
| Copper | Distinctive appearance and craftsmanship | Care and cleaning instructions |
| Detailed or custom cutter | Unusual shapes and personalized designs | Food-safe materials and a smooth, suitable finish |
Choose a size that matches the occasion. Large cookies leave more room for icing, but they take longer to bake and can be harder to serve neatly; small cookies suit a crowded party tray. Some personalized cutters are 3D-printed, so check that the product is explicitly made from food-safe materials before using it with food.
How to cut crisp Halloween shapes without sticking
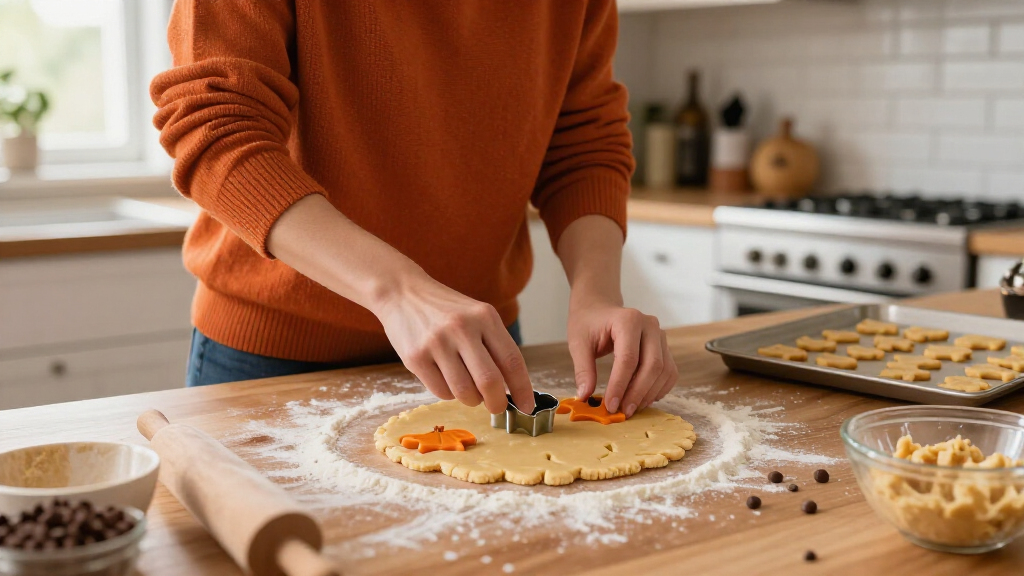
To get crisp Halloween cookie shapes, chill the dough, use a light dusting of flour only if needed, and press the cutter straight down without twisting. Firm, cool dough holds detailed edges better than soft dough. If a bat’s wings or a haunted house’s roof keep tearing, pause and chill the dough instead of trying to force the cutter through it.
- Roll firm dough on a lightly floured surface, following your recipe’s thickness guidance. Sugar-cookie dough and gingerbread are popular choices because they can hold a shape.
- Chill the rolled sheet if it feels soft or sticky. Cold dough is easier to handle and less likely to stretch as you lift each cutout.
- Dip the cutter lightly in flour only if dough clings. Too much flour can leave a dusty taste or change the dough texture.
- Press straight down and lift straight up. Twisting can distort the outline, especially on pointed shapes such as stars, ears, and roof peaks.
- Move each cookie with a thin spatula onto the baking sheet. Bake similar-sized shapes together so smaller cookies don’t finish far earlier than larger ones.
Here’s a real kitchen example: you cut a row of cats, then notice the last few have rounded ears. The dough warmed while you worked. Slide the sheet into the refrigerator for a short chill, then continue when it feels firm again. Follow the recipe’s bake time and temperature, and don’t assume a large pumpkin and a tiny bat will finish together.
For a cookie dough that contains raw egg, keep it chilled while you work and avoid tasting it uncooked. Use clean hands and utensils, and let baked cookies cool on a clean rack before you decorate or pack them.
How to decorate cookies that look party-ready
Decorate Halloween cookies only after they have cooled completely, and use a few clear visual details rather than trying to cover every inch. A cookie that’s still warm can melt icing into a shiny puddle and blur the outline you worked to preserve. Give the tray time to cool, then set out icing, sprinkles, and toppings in small bowls.
Try a quick color plan before you begin: orange and green for pumpkins, white and black for ghosts, or purple and charcoal for bats. On a ghost, two small dots can make a face; on a tombstone, a short word in dark icing may be enough. The bright orange against white icing makes a loud color on the table, even before the first bite.
Stamps and embossers can add texture to dough or fondant, but test one on a spare piece first. A fine web pattern may look crisp before baking and fade if the dough spreads. If you’re making a batch for a party, decorate one sample cookie and bake it before committing to all two dozen. That small test can save an evening of scraping icing off misshapen bats.
Food safety matters at the decorating table, too. Keep toppings and icing protected from pets, raw ingredients, and dirty hands; use clean utensils when several people share bowls. Label common allergens in your recipe, such as wheat, eggs, milk, soy, or nuts, and tell guests what’s in the cookies. If your cookies contain perishable fillings or toppings, follow safe storage guidance for those ingredients rather than leaving them out indefinitely.
How to clean and store cutters for next Halloween
Clean Halloween cookie cutters according to the maker’s instructions, then dry them fully before storage. Hand washing is a safe default for cutters with seams, coatings, moving parts, or delicate details, since dishwasher heat and movement may damage some designs. A damp cutter tucked into a drawer can invite rust on metal or leave residue around narrow edges.
After baking, wash cutters in warm water with dish soap, paying attention to corners and stamped details. A soft brush can help lift dough from a tiny bat wing without bending it. Rinse, dry thoroughly with a clean towel, and let the cutters air-dry completely before you pack them away.
Consider a baker who finds a favorite copper cat cutter at the bottom of a crowded drawer a year later. It’s more likely to stay in good shape if it was dry, protected from bending, and stored where heavier utensils can’t crush it. A small box or divided container keeps narrow points and intricate edges from catching on other tools.
Keep food cutters apart from tools used for clay or other craft materials. Even a cutter that looks clean may have residues you don’t want near food. Put craft tools in a separate, clearly marked container, and check food cutters for rust, bent edges, cracks, or loose parts before the next batch. That quick inspection is especially useful when you pull out seasonal tools you haven’t touched since last fall.
What to remember before baking with kids or for a party
A successful Halloween baking session starts with a cutter that’s safe to handle, a dough that’s cool enough to shape, and a plan for serving the finished cookies. Metal edges can be sharp, and pointed details may catch little fingers, so supervise children and let adults handle cutters with narrow or delicate parts. Children can still help press broad shapes into dough or decorate cooled cookies.
For a family afternoon, set out a pumpkin, a ghost, and a cat instead of a dozen intricate designs. You’ll spend less time rescuing broken cutouts and more time watching kids add chocolate-chip eyes. For a party, bake a mix of sizes: small cookies are easy to grab, while a few large haunted houses can anchor the table.
Make your shopping decision based on how you’ll actually bake. A classic set of clear, sturdy shapes is a practical choice for sugar cookies and gingerbread; unusual or custom shapes make sense when you have a specific party theme. If a set includes stamps, check whether the details are deep and open enough to clean without a struggle.
A cutter sets the outline; cool dough, careful handling, and a simple decoration make the cookie memorable.
Before serving, keep cookies covered and store them according to the recipe and toppings used. Plain, fully baked cookies generally store differently from cookies with perishable fillings, so follow safe handling instructions for any dairy-based or otherwise perishable topping. Label allergens clearly when you share a tray at school, work, or a neighborhood gathering.
Frequently Asked Questions
What dough works best with Halloween cookie cutters?
Firm sugar-cookie dough and gingerbread dough both work well because they can hold their shapes. Chill the dough if it feels warm or sticky, especially before cutting detailed designs such as bats or haunted houses.
How do I stop dough from sticking to a cookie cutter?
Start with cold, firm dough, then lightly flour the cutter if it still sticks. Avoid adding a lot of flour to the dough, since that can affect its texture; chill it again if it softens while you work.
Should I twist a cookie cutter when I press it into dough?
No—press straight down and lift straight up. Twisting can stretch or distort the dough’s edges, especially on shapes with points or narrow sections.
Are metal or plastic Halloween cutters better?
Metal cutters are sturdy and generally cut cleanly, while plastic cutters can offer a comfortable grip and may include built-in stamps. Choose based on the design, how often you bake, and the manufacturer’s care instructions.
Food-safe cutters can often shape fondant and soft foods such as sandwiches or fruit. Keep craft cutters separate from food tools, and clean food cutters thoroughly between uses according to the product instructions.
Can children use Halloween cookie cutters?
Children can help with broad, easy-to-handle cutters under adult supervision. Metal edges and pointed details can be sharp, so an adult should manage intricate cutters and help move cutouts to the baking sheet.
Conclusion
Pick recognizable, food-safe shapes and work with cool dough. That simple combination gives you cleaner cutouts, easier decorating, and fewer lopsided ghosts on the tray. Keep your cutters clean and dry, and they’ll be ready when the next October chill rolls in.
Then let the decorations do their small magic: a pumpkin-orange grin, a ghost with chocolate-chip eyes, a bat that disappears before the party ends.
Fall Picks
fall essentials
As an affiliate, we earn on qualifying purchases.